Last Updated: March 3, 2025
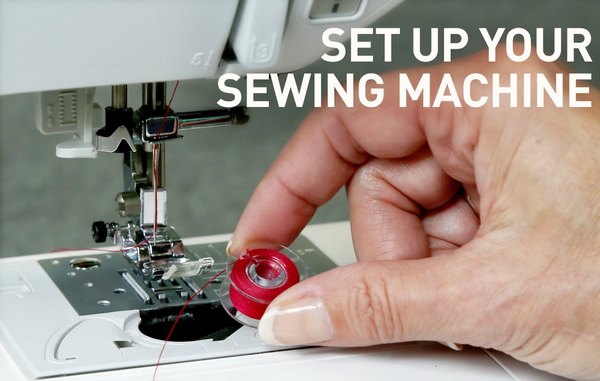
Set Up Your Sewing Machine:
Before starting setting up a sewing machine, firstly you should check sewing manual, if you have one. It should give diagrammatical instructions how to set up a sewing machine. You will need to set up the machine on a sturdy table, near to a power supply and with plenty of light so that you can see what you are doing. Select a reel of thread to match or contrast with your fabric or fabric sample piece. This thread will be used to wind the lower bobbin and thread up the top of the machine. They should always be threaded with matching threads. These two areas work in unison, bringing upper and lower threads together to form stitches. Plug in your machine or combination machine and foot pedal controller. Next turn on your machine. Always turn it off when not in use.
Wind the bobbin:
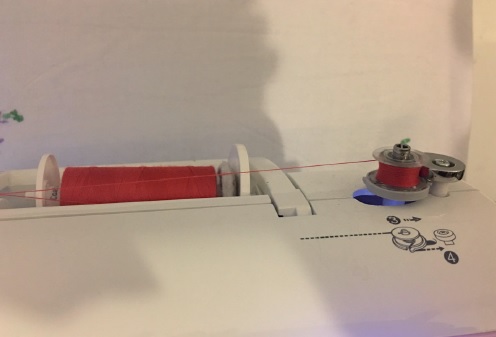
If you are a new in operating sewing machine. Then at first you have to learn how to thread a bobbin on a sewing machine. Select an empty bobbin and push this onto the little bobbin winder spool pin at the front. But at first you have to sure that the bobbins you have purchased are right for your machine. Next, note the larger spool pin behind and remove that spool cap. The cap appears as a disc with a hole in the centre. Place your reel of thread onto the larger spool pin behind and replace the spool cap. This will hold the thread in place and stop it spinning off the machine when you are winding the bobbin and sewing. Take the thread and pass it though the bobbin winder guide and pre-tension disc and then wind it once or twice around the bobbin. On new machines there will often be numbered markings printed onto the machine to remind you how to thread up the bobbin winder. This bobbin then needs to be pushed and clicked into place to engage the winder. To wind the thread onto the bobbin press the foot pedal control or operation control button if you are not using a foot pedal. The bobbin thread winds until it is almost full and should stop automatically. Cut the thread and remove the bobbin from the winding spool.
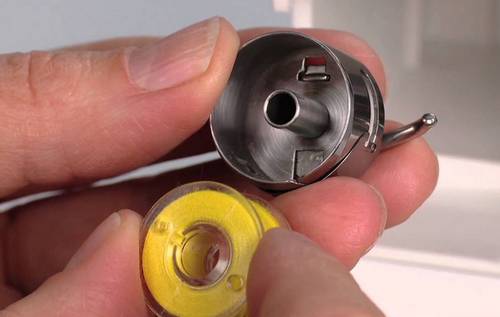
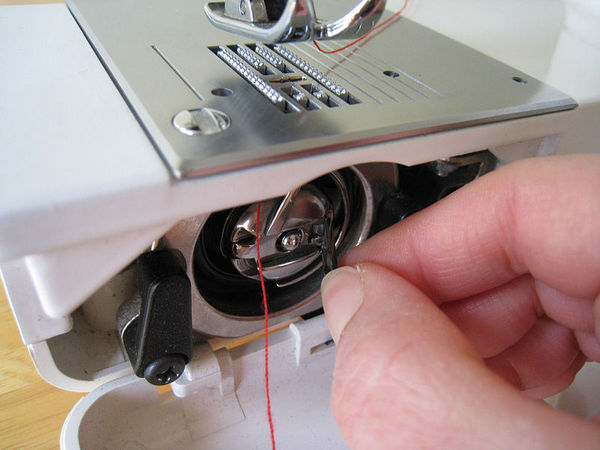
Placing the bobbin into a separate metal bobbin case:
Front-loading machines have separate bobbin cases into which you will need to fit the bobbin. To do this you will hold the bobbin case in one hand whilst holding the bobbin in the other and push the bobbin into the case. Take the loose thread and pass it through the downwards slit into the case. Keeping the thread tight against the case, slide it between the main body and a small attached flap that clips tightly onto the outer case. The thread will follow through and emerge at the small open rectangle in the case side. Pull out about 10cm of thread. The bobbin case is then ready to be inserted into the machine.
Inserting the metal case and bobbin into the bobbin driver:
The bobbin driver is housed in the small space under the needle plate at the front of the machine. There will be a tiny door at the front which opens up to do this. Note that the bobbin has a metal arm. Holding the arm pointing upwards and the metal case towards you, insert the bobbin into the bobbin driver. When it is positioned correctly gently click it into place. Tuck in the threads and close the door.
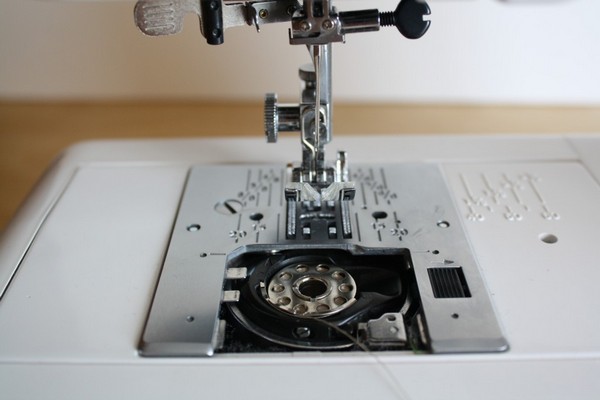
Putting the bobbin directly into the machine:
On top-loading machines there is no bobbin case and the bobbin is inserted directly into the machine just in front of the needle plate. There is often a small plastic cover which slides to the left to reveal the space into which to put the bobbin. The bobbin should be inserted with the thread to the left. Thread will then be passed through a marked groove in the machine on the left. Pull out a few centimetres of thread towards the left side. Replace the cover once the bobbin is in place.
Threading up the upper thread of the machine:
Correctly sewing machine threading is the absolute basic starting point. Besides, it is very essential task to set up a sewing machine. Most machines will have printed or raised numbered indicators showing how to thread up the machine. Many will also have diagrams marked onto the machine. Every model will thread up slightly differently. If the machine is not threaded correctly it will not stitch properly and the threads will snag and break.
Step 1: Raise the presser foot lever
The presser foot must be raised to thread up the machine.
Step 2: Raise the needle
Raise the needle by turning the hand wheel slightly towards the back of the machine. If there is a needle position button, press this as required to raise the needle.
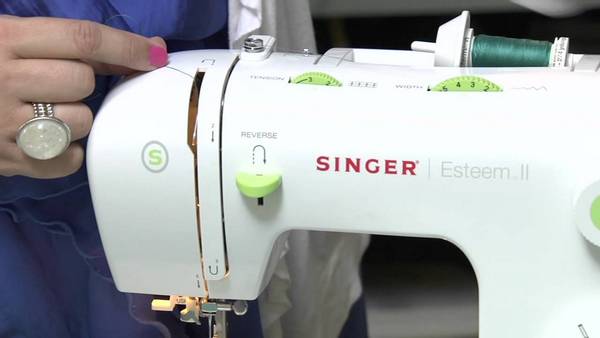
Step 3: Place the reel of thread onto the spool pin
Remove the spool cap, place the thread onto the main spool pin and replace the cap.
Step 4: Take thread through the thread guide
Pull thread from the reel and pass this through the first thread guide hook from right to left. This hook will sit just to the left of the reel of thread.
Step 5: Pass the thread through the thread guide cover
A second hook will sit to the left of the first. Pass the thread through this next guide from right to left and down the channel below this. There will be two channel paths; take it down the right side.
Step 6: Pass the thread through the take-up lever
Raise the take-up lever by turning the hand wheel towards the back. Take the thread upwards through the left side channel to reach the take-up lever. Pass it through the raised hook on this lever, hooking through from right to left.
Step 7: Take the thread down to the needle bar hook
Pass the thread back downwards from the take-up lever through the left side channel. Hook it under the thin metal hook at the top of the needle.
Step 8: Thread the needle
The needle is normally threaded from the front to the back, although some may thread from side to side. Thread the needle and pass the thread under the presser foot to the left and towards the back. Cut thread, leaving about 10cm.
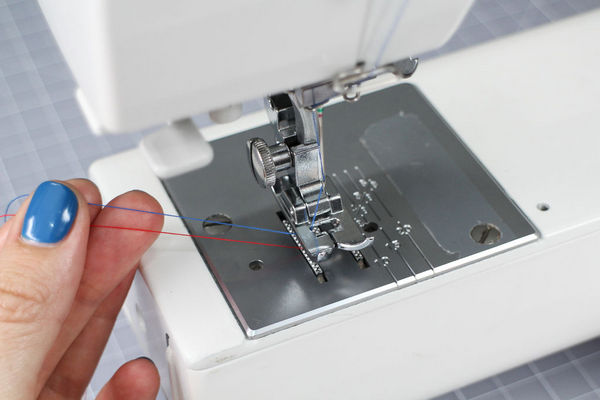
Pull up the lower thread ready for sewing:
Hold the end of the top thread coming from the threaded needle. Turn the hand wheel forwards until the threaded needle dips down into the hole in the needle plate and catches the lower thread. Take hold of the two thread ends and pull gently to the left until the lower thread comes up completely. Place these ends to the left behind the needle foot and towards the back. There should always be about 10cm of each thread; if there is too little the machine will come unthreaded as you sew.
Sewing a sample:
The machine is now ready to sew. Select a straight stitch function and a medium-length stitch, roughly 2 out of 4 options. The width will be selected as ‘0’ as the stitch is running in a long straight line. Computerized machines may select the options when you chose the straight stitch function. Leave the tension on the middle setting at about 3 of 6. Raise the presser foot lever, take a scrap of fabric and place this under the presser foot with the raw cut edge to the right up against the 2cm marker on the needle plate. Lower the lever and sew forwards to get the feel of the machine and check the stitching. Press the reverse lever or button to finish off at the end. Raise the presser foot lever and the needle. Remove the fabric by pulling the fabric away from the machine at the left, leaving about 10cm of thread. Cut off the thread and remove the fabric from the machine.
References:
- Understanding and Using A Sewing Machine by Nicola Corrigan
- Sewing Machine Reference Tool by Bernie Tobisch
- The Sewing Book by Alison Smith
- https://www.cucicucicoo.com
- https://www.yellowspool.com
- https://sewingfromhome.com