Last Updated: March 3, 2025
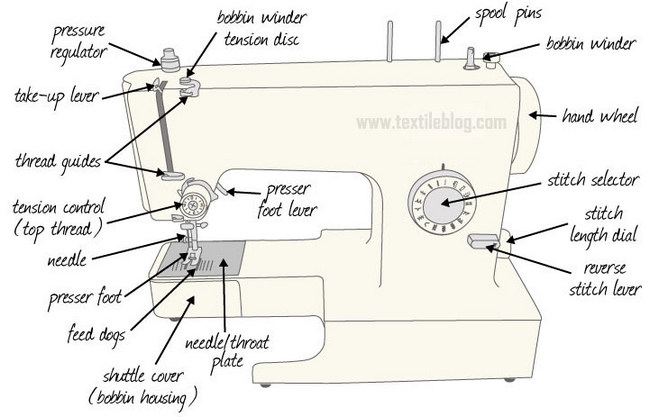
Sewing machine is a device which is used to sew fabric or any other parts of the materials. It is used in both the lather and apparel industries. In order to learn to use your sewing machine you must become familiar with all the functions and parts. In this article, I will explain different parts of sewing machine and their functions. The most important elements of sewing with a machine are threading the top thread and the bobbin. The machine takes threads from the upper and lower threads to make the stitching. When straight stitching, these should appear as neat regular stitching. If the stitches are irregular or threads keep breaking or snagging, it is often a result of mis-threading or winding the lower bobbin incorrectly. It can also be an issue with tension. This all takes practice.
Different Parts and Functions of Sewing Machine
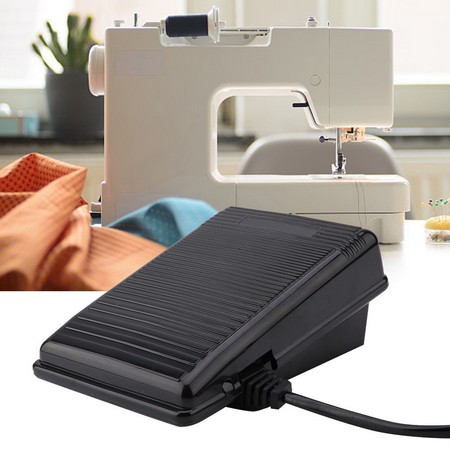
On / off switch:
This is normally over towards the right side at the bottom of the machine. The power cord is attached to the foot pedal. The foot pedal goes on the floor where your foot can comfortably reach it. It should be switched off when not in use.

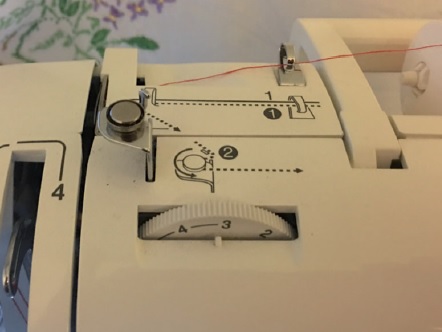
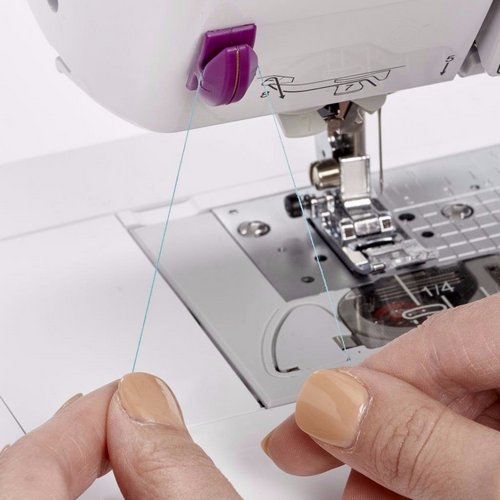
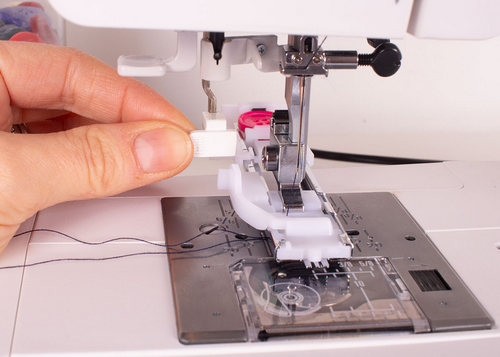
Threading upper thread:
Many machines will have numbered markings and little printed diagrams just near the thread spool pin to help guide the threading of the machine. Each machine threads up differently but it always involves a sequence of taking thread from the reel through a succession of hooks and essentially a thread take-up lever. Finally the needle needs to be threaded; normally this is from front to back. After you have threaded it up a few times it will seem very simple.
Bobbin:
This is the small spool onto which you will wind the lower threads. Bobbin is an integral and non-electrical part.
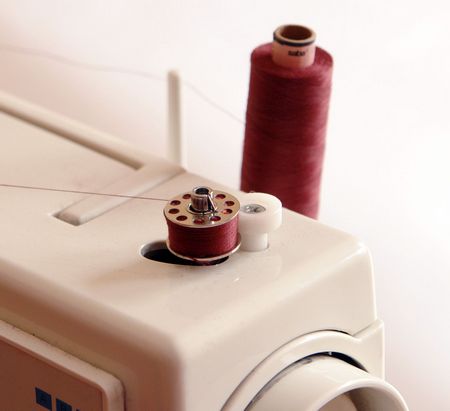
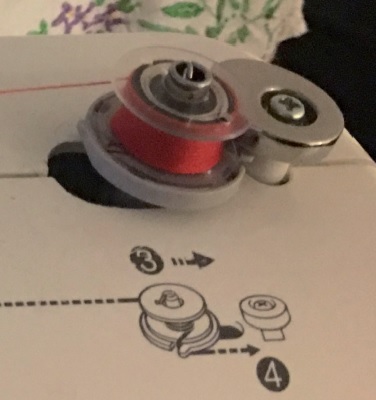
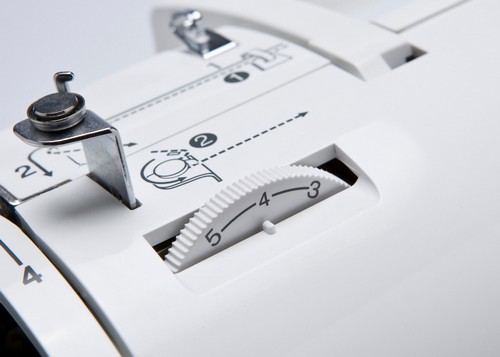
Bobbin winder:
The lower bobbin is wound by placing an empty bobbin onto a bobbin winder spindle. The thread is wound onto the bobbin using the foot pedal control or the operation control button. The bobbin winds until it is almost full and should stop automatically.
Bobbin cover for top-loading machines:
This will vary on different machines. It should appear as a plastic cover at the top and just in front of the needle plate. This slides out to reveal the space into which you slot your bobbin. On front-loading machines bobbins need to be placed into a metal bobbin case and loaded from the front of the machine.

Metal bobbin case:
Front loaders have a separate metal bobbin case into which you will need to fit the threaded bobbin. Together these are then placed into the bobbin driver, which is accommodated under the needle plate zone.
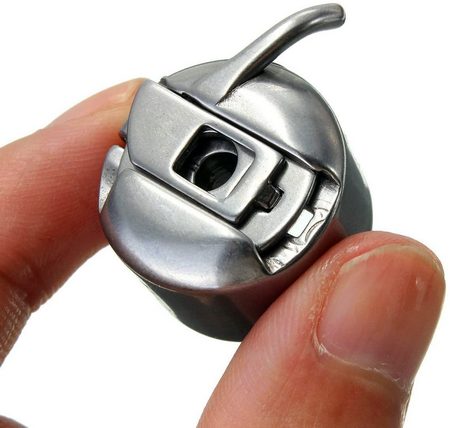
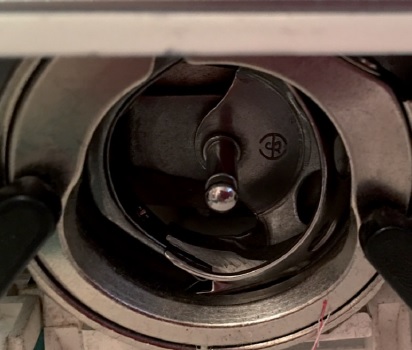
Bobbin driver:
This small space is accessed through a tiny door at the bottom front of the front-loading machine. The loaded metal bobbin case is inserted into this area ready for sewing.
Thread tension dial:
The thread tension dial will generally appear as a small numbered dial. For many projects it will work to leave this dial on a medium setting of about 3 out of 6 options. To loosen it take it to a higher number, to tighten it take it to a lower number. Computerized machines can adjust the tension automatically and some also allow you to manually override this. An essential element to sewing is getting the tension right. Both upper and lower threads have to be adjusted to work together to create good stitching. If this is not happening the stitching may come out too tight or too loose. The stitches should cross over at the centre and through the fabric. Nearly all tension adjustment takes place on the upper threads. Tension may need to be adjusted when you sew different fabrics and projects. It is always essential to sew a small sample with any new fabric to check the stitch and sewing quality.
Thread cutter:
There is a thread cutter attached to most machines. This should be on the left side, above and behind the presser foot lever. You simply hook the thread through to cut it.
Foot pedal:
The foot pedal or the operation control button will determine when you start to sew and how fast you go. The foot pedal will plug in to the right side of the machine and sit below your table on the floor once you are stitching. It will regulate sewing speed.
Start / stop operation control button:
This will appear as a small button, just above and to the right of the presser foot area. Some machines operate by using this button and no foot pedal. When this is pressed your machine will first begin to sew slowly. There may also be the option of using a foot controller too. When plugged in, this will override the start/stop button.
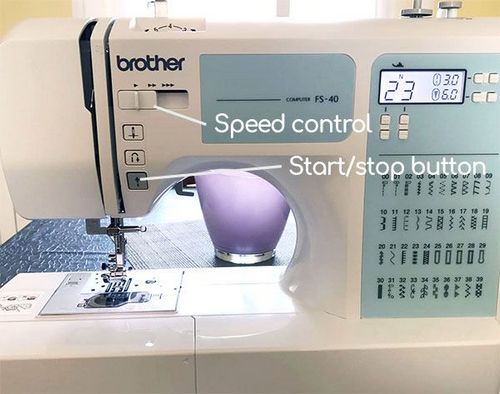
Speed control lever:
Machines with an operation button will have a speed control lever, which can direct stitching speed. It will slide to the right to go faster. See above image.
Reverse stitch lever:
You will normally use the reverse stitch function at the beginning and end of sewing to secure the stitches firmly in place. On some machines a small amount of reverse reinforcement may happen automatically at the start of stitching. The control functions for reverse stitching will appear as a small button or a push-down lever.

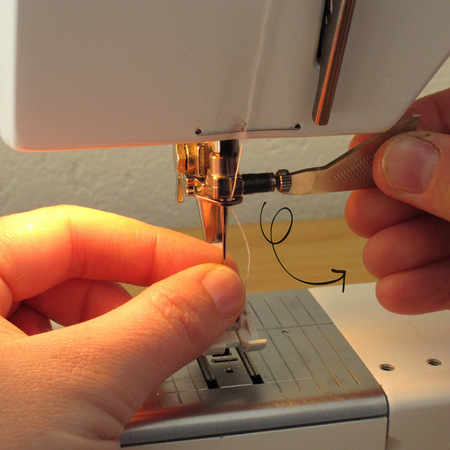
Needle threader:
Some machines will have an automatic needle threader to help thread the needle. This will be located just to the left and slightly behind the presser foot holder. It pulls downwards to help with threading. You cannot use this with twin needles.
Needles:
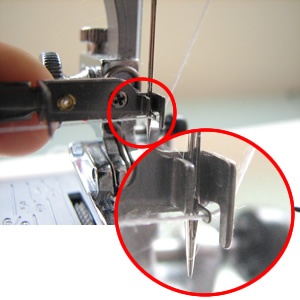
The needle needs to be inserted into a machine clamp to attach it to the sewing machine. A small screw holds the clamp in place and this must be loosened to change a needle. There are flat and rounded sides to the top of the needle, which must be placed with the flat side at the back of the clamp and pushed upwards. Needles must be changed if they become bent. Machines are generally threaded front to back, although some machines may thread from side to side. The thread must not be twisted but should be passed evenly through the upper thread system and then through the needle.

You must use the correct type of needle for different fabric weights. You will need a sturdier needle for heavy fabrics such as denim and a finer one for lighter fabrics such as a fine cotton. Always use good quality needles that are compatible with your machine, although many are largely universal.
Inserting and changing the needle:
To insert a new needle you will need to hold the old needle and unscrew the needle clamp screw to open up the clamp. Needles have both a flat and a rounded side at the top. The flat part must be placed against the back of the clamp and pushed upwards until it is in place. When changing a needle, make sure that the needle is raised by using the hand wheel or the needle position button if there is one.
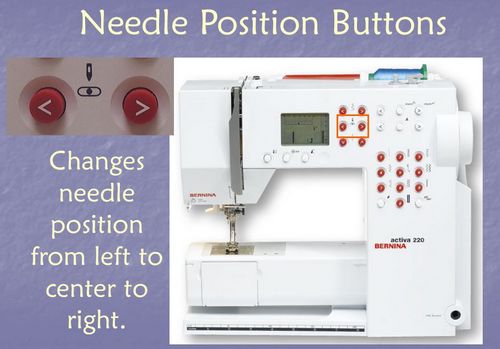
Needle position button:
Some computerized machines will have an option to raise and lower the needle with a button.
Twin needle:
These can sew two parallel lines of stitching coming off two spool pins of thread. They must be used with a zipper foot as they need a wider hole in which to stitch through.

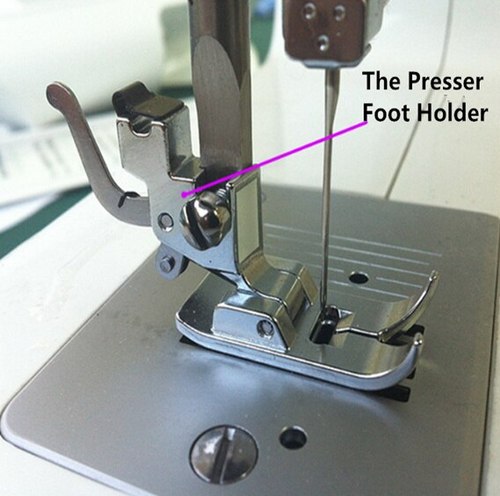
Presser foot holder:
A screw holds this in place and this in turn holds the presser foot. Machines will come with a small screwdriver for adjusting the screw. This must be properly fitted but should rarely need adjusting.
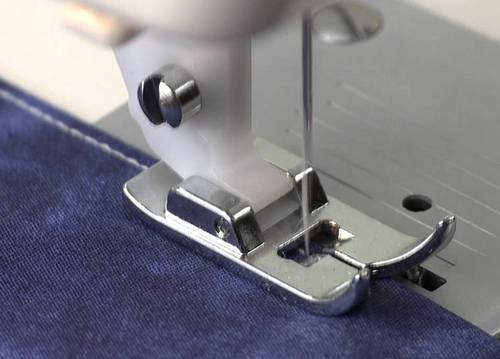
Needle presser foot:
This sits below the needle and the needle passes through it as it stitches. Sewing machines come with a range of feet and will normally come fitted with a zigzag foot that is also used for straight stitching. You can use this for many projects. You need to use a presser foot that is designed for the type of stitching that you are doing. For example, if you selected a wide zigzag stitch and did not use a zigzag foot, the needle would hit the metal sides of the foot as the hole would be too narrow. Choose the new foot and insert it by lining it up with a notch in the holder. Lower the presser foot lever and click the foot into place. You should also be able to push it in.
A new machine will come with at least a selection of feet including: a buttonhole foot, normally two zigzag feet, a zipper foot which can be used on either side of the needle, an overcasting foot, a blind stitch foot and button fitting feet. You can get more attachments and feet from your machine supplier. More specialist options include: appliqué, quilting, free motion stitch, edgestitch, piping and walking feet. Domestic sewing machines will generally take universal high shank feet. You can obtain a foot that will suit almost any task.
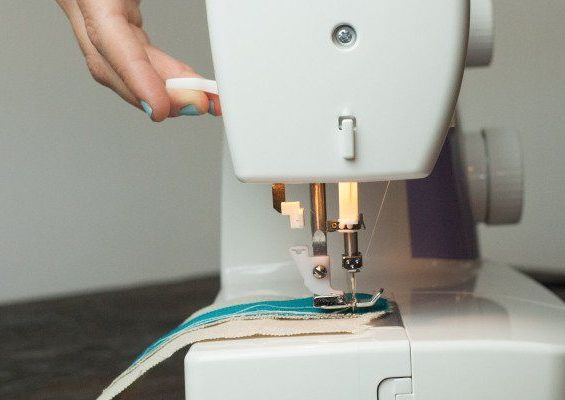
Presser foot lever:
It is also called presser bar lifter or take up lever. This raises and lowers the needle foot at the start and end of stitching. Before placing fabric under the presser foot, raise the lever completely; this will keep the needle from snagging the fabric. It is situated just up and to the right of the presser foot.
Presser foot release button or lever:
It is a button or a lever on the back of the presser foot holder. Make sure that the needle is up before adjusting the feet. At the back of the presser foot holder a small button releases the foot when you want to change it. When you touch this it should disengage and drop the foot.
Needle plate or Throat plate:
Below the needle foot sits the needle plate, which the needle will pass through as it begins to sew. This will normally have calibrations marking useful measured amounts like a 1.5cm seam allowance. These are really helpful as straight line guides once you start to sew.

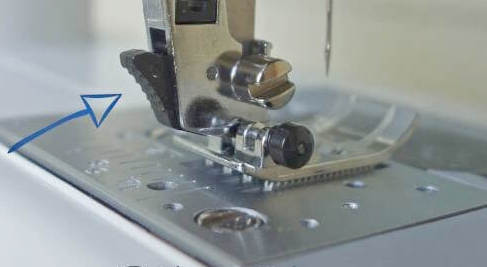
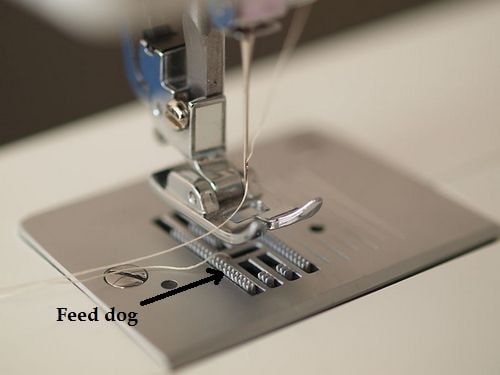
Feed dogs:
These enable the fabric to move through the sewing machine as you sew. The speed at which they do this is normally determined by the foot pedal. On machines that can work without a pedal the speed control lever will govern how fast they work.
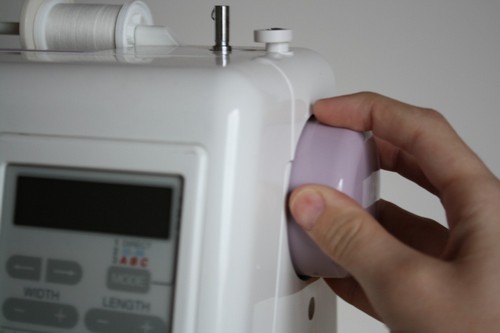
Balance or hand wheel:
At the top right side of the machine is the balance wheel. This is used to raise and lower the needle and guide the needle down into the fabric. It is also useful when you need to pivot and turn on corners whilst keeping the needle in the fabric to create an even line of unbroken stitching.
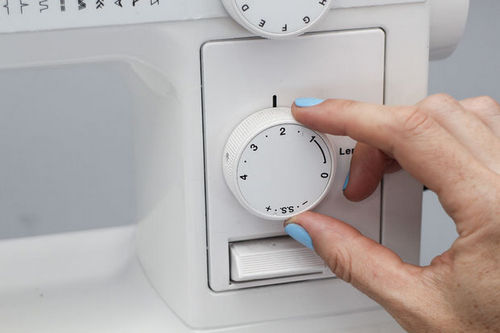
Stitch length regulator/selector:
This may be shown as a numbered sliding scale alongside stitch markings printed onto the machine or panel. On computerized machines there may also be an operation panel with markings from 0 to 5. Such machines may automatically select the stitch length although you can override and change this.
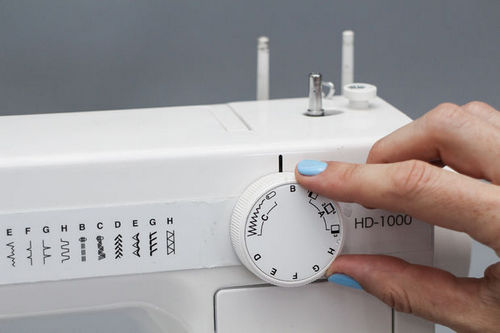
Stitch options or Stitch selector:
Stitch selector dial lets you pick what kind of stitch you want to use. Many new machines come with sixteen to twenty-four stitch options, including a choice of buttonholes. These appear printed on the machine. They will include straight stitch, zigzag stitches, blind hem stitch, buttonholes, stretch stitch for sewing stretchy fabrics, overcasting, appliqué and decorative stitches.
Buttonhole lever:
This will be over to the left above the presser foot. It pulls down and sits to the left between brackets on the buttonhole foot.
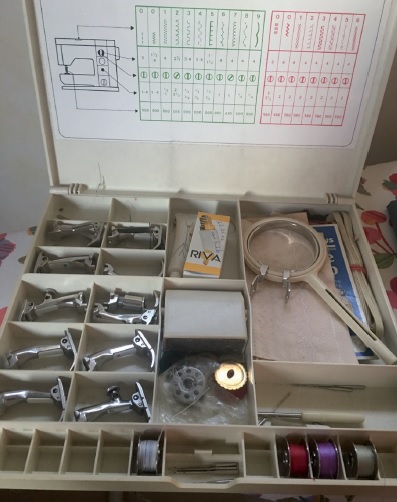
Equipment accessory box:
There will be an integral storage box underneath and to the front of the needle plate area. This is for keeping all your spare bobbins, feet, needles, spare spool pins and the machine screwdriver. Always replace and keep the accessories in here so that you don’t lose them. Sometimes the box is separate from the machine.
References:
- Understanding and Using A Sewing Machine by Nicola Corrigan
- Sewing Machine Reference Tool by Bernie Tobisch
- The Sewing Book by Alison Smith
- https://clothingindustry.blogspot.com/2018/01/sewing-machine-parts-functions.html
- https://stitchingincolour.com
- https://www.instructables.com