Last Updated on 24/02/2025 by textileblog
Assignment Name: Making a quality report of a batch of finished knit fabric.
Theory:
Fabric is the main raw material for garment manufacturing and it involves 60-70% of total garment cost. To ensure that only quality fabric is used in garments, factory takes precautionary measures and set up fabric inspection department with qualified personnel. The quality of a final garment depends on the fabric when it is received as a roll from the knitting department. Even the most outstanding manufacturing methods can not compensate for defective materials.
As per quality standards, prior to bulk production cutting, factory prepares following three reports and takes approval from authorized person.
- Fabric inspection report
- Shade band report for 100% fabric rolls (applicable for dyed and printed fabric).
- Fabric shrinkage report
The above three reports are submitted for approvals within 48 hours of fabric in house. According to Standard procedures (SOP), initially only 10% of the fabric rolls is inspected on 4-Point System. If there is any doubt on acceptance further 10% of total fabric rolls are inspected. Some manufactures prefer doing 100% fabric inspection in order to get ensure that only quality fabric is cut and fed to the line. During 100% inspection fabric inspectors mark all the defects so they can identify them during spreading and replace the parts after cutting.
If fabric is cut without being inspected, complete responsibility will be on fabric quality inspection department as it is a violation of a critical aspect. Reports are submitted to buyers and the relevant merchandiser.
Objects of this assignment:
- To understand the importance of quality of a fabric.
- To know about the fabric inspection procedure.
- To know about the fabric inspection reports.
A. Fabric Inspection Report:
Purpose:
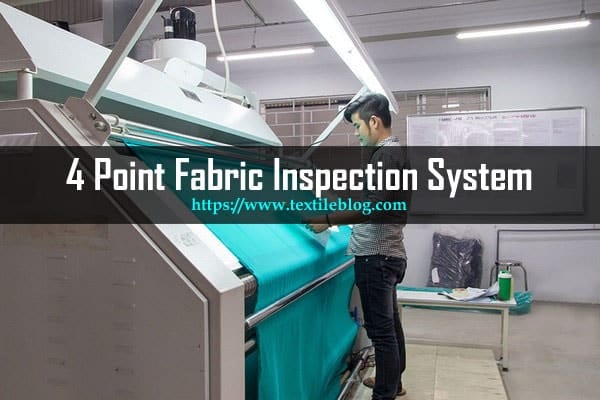
To decide acceptance or rejections of fabric roll (For Woven). Fabric inspection is done using 4-point system. Inspection procedure has been explained in the following table.
| Activity | Requirement |
| 1. Select rolls | Roll to be chosen at random |
| 2. Check the roll as per 4 points system. | |
| 3. Give penalty points for defects | |
| 4. Calculate index for each individual roll. | Points / 100 sq. yd. = (Total points in roll * 36 * 100)/ (Total length in yards * width in inches) |
| 5. Calculate final average index for the total no. of rolls inspected. | |
| 6. Decide acceptance or reject of the fabric |
Penalty Point Evaluation:
Defects in both the Wales and Course directions for woven and course/wale directions for knits are assigned point using the following criteria:
| Points | Inches (”) | (mm) |
| 1 Point | Defects up to 3 inches | Up to 75mm |
| 2 Point | Defects > 3 inches < 6 inches | Defects > 75mm< 150mm |
| 3 Point | Defects > 6 inches < 9 inches | Defects > 150mm< 230mm |
| 4 Point | Defects > 9 inches | Defects > 230mm |
A continuous defect running 9 inches / 230mm or longer is assigned four points for each meter that occurs within the shipment. Other important parameters to be considered during fabric inspection are –
- Length of the faults is to be measured in the warp or Course direction and the direction in which the fault is longest is the fault direction. However when the warp and Course length are same and when the penalty of the shorter direction is heavier, take the fault of the direction in which the penalty is heavier.
- When the fault in the warp direction is over 1 yd, the part which is over 1 yd is deemed as fault of the same kind of others.
- When two or more faults overlap, apply only the faults which penalty is the heavier.
- When there are two or more faults within the length of 1 yd and the penalty points come over 4 points, the points over 4 points are not added.
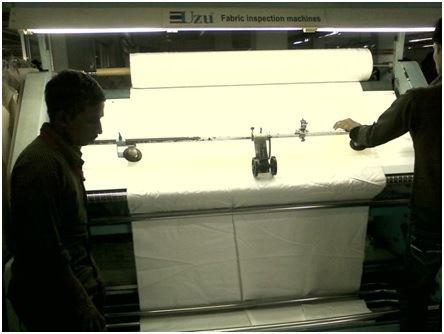
- The inspector needs to be at a distance of 3 feet away from the inspection table and the linear speed of inspection not to be less than 0.1 meters per second when inspection is done on fabric inspection machine.
Standards for Passing Fabric:
- Average index for inspected rolls not to exceed » 28 points / 100yd².
- Maximum index for any roll not to exceed » 40 points / 100yd².
B. Fabric Shade Band Report:
For styles those required garment washing, before and after wash blankets is submitted (3 sets each) covering all rolls and it is attached in the shade continuity card.
A 100% shade band covering all rolls & all colors pertaining to a certain style / Consignment is made and get approved prior to cutting of bulk Fabric.
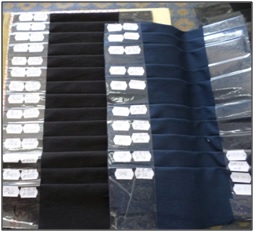
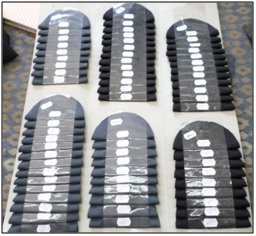
Shade band preparation process:
- No sooner the fabric is inhoused, the quality department collects fabric panels representing all rolls within 6 hours from store.
- Cut 6 inches from end of each roll. Join all panels by cover stitch in correct grain line direction to be in a blanket form.
- If the style is a non-wash program two sets is prepared.
- If the style consists of a certain wash, then 4 blankets is prepared – 2 blankets non-washed and 2 blankets with the exact approved wash of the style.
- Once the shade bands are ready, dye lot or colour segregation is done. If the Shade Band consists of 2-3 different shades, such shades should be segregated into families marked A, B, C Etc. A copy of the segregation of shades is handed over to the store, cutting room, merchandising and production departments. Stores will issue and cutting and production department will proceed as per the segregated shades without getting mixed.
C. Fabric Shrinkage Report:
a) A 100% Shrinkage report is submitted for all styles and the washing shrinkage has to be performed as per the wash type required for the bulk.
b) Garment fit is a very important factor in the purchase decision of the customer. Misfit at any stage of the life of garment can lead to premature rejection and earn a bad perception for the brand. A garment is supposed to be washed after every use and expected to retain the same fit and appearance during the lifetime of the garment. To fulfill this fabric has to be tested for dimensional stability. For this shrinkage tests are carried out is order to manipulate the patterns in the same ratio to avoid any measurement problems after garment washing.
c) Shrinkage Templates (25cm*25cm or 50cm*50cm) are used in industry to gauge the shrinkage % directly.
Features of shrinkage template and scale:
To determine directly the % dimensional change (shrinkage) in all types of fabrics:
- Fine calibrated Shrinkage Template with 25cm x 25cm” & 50cm” x 50cm” benchmarks length-wise & width-wise
- Calibrated scale to evaluate shrinkage and stretch directly Up to 15%.
- Two fine tipped black and yellow fabric markers are used for accurate marking on light and dark colour fabrics.
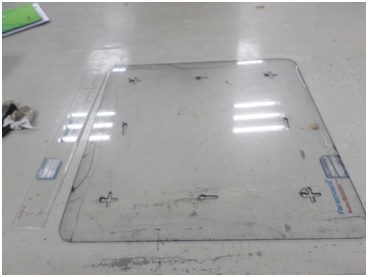
Working Method of Shrinkage Template and Scale:
- The marking template should be placed on the specimen to be tested, making sure that the fabric is in flat position before marking.
- Hold the template firm, and carefully mark the fabric through the eight slots of the template, to ensure that it does not move.
- Now put the fabric in the washing machine or Dry Cleaning.
- Dry the sample as per specified method. It can either be Line Dry or Flat Dry or Tumble Dry.
- To find the dimensional change read the Shrinkage/Stretch on 3 points on the Wales side and 3 points on Course Side.
- Get the mean value of Wales wise and Course wise readings to get the Accurate Shrinkage or Stretch.
- If there is no any shrinkage template then one can calculate the shrinkage or gain as directed in Equations 1 and 2 by marking fabric with help of a simple scale.
- S = [(A – B)/A] x 100
- G = [(B – A)/A] x 100
Where:
A = distance between gauge marks before wet out, 10 inches (254 mm)
B = distance between gauge marks after wet out and drying
G = % gain (In reporting the gain, the percent change shall have the prefix “+”
S = % shrinkage
Conclusion:
The price of any garment is determined by its quality. Make no excuses. It doesn’t matter who made the garment and where it was made. Quality clothing last longer and inferior quality can break down fast in comparison to normal wear and tear. So inspecting and controlling the quality of fabric in garments industry is a crying need. This assignment though shows a bird’s eye view of the quality inspection of a finished fabric.
You may also like:
- Fabric Inspection and Control System in Textile Industry
- 4 Point System for Fabric Inspection with Example